Using DeepTutor with PayPerQ
Run the DeepTutor AI tutor on pay-per-use PayPerQ models instead of a subscription, configured through DeepTutor's own setup wizard.
What is DeepTutor?
DeepTutor is an open-source, agent-native personalized tutoring system from the Data Intelligence Lab at the University of Hong Kong (HKUDS). It runs as a web app and as a command-line tool with an interactive chat, and it can use knowledge bases, notebooks and other learning tools alongside the chat.
DeepTutor accepts any OpenAI-compatible endpoint as a "Custom" provider. That is how you connect it to PayPerQ: you give it the PayPerQ base URL, your API key and a model ID in its setup wizard.
Step by Step Set Up
1. Prerequisites
- A PayPerQ account and API key. Open ppq.ai/api-docs to copy your key; the page also shows the base URL,
https://api.ppq.ai. - Python 3.11 to 3.14, which DeepTutor's install docs require.
2. Create a folder and a virtual environment
Run these commands in a terminal, one at a time. First create a working folder for DeepTutor and enter it:
bashmkdir -p my-deeptutor && cd my-deeptutor
Create a virtual environment:
bashpython3 -m venv .venv
Activate it:
bashsource .venv/bin/activate
Your prompt now starts with (.venv).
Windows: DeepTutor's docs give this PowerShell command for the virtual environment:
py -3.11 -m venv .venv-cli ; .\.venv-cli\Scripts\Activate.ps1. Use it in place of the two commands above.
Note: DeepTutor stores its settings in a
data/folder under the folder you start it from, so run every laterdeeptutorcommand frommy-deeptutor, with the environment active.
3. Install DeepTutor
Run a command to install the full package (web app and command-line tool):
bashpython -m pip install -U "deeptutor[full]"
Expect a long list of installed packages ending without an error.
4. Add PayPerQ with the setup wizard
Run a command to start DeepTutor's setup wizard:
bashdeeptutor init
Answer the prompts in order:
- Backend port [8001]: press Enter.
- Frontend port [3782]: press Enter.
- Pick an LLM provider: type c (Custom / Other) and press Enter.
- Binding [openai]: type custom and press Enter.
- Edit Base URL? [Y/n]: press Enter to accept.
- New Base URL: type https://api.ppq.ai/v1 and press Enter.
- API key (input hidden, Enter to skip): paste
<your PayPerQ API key>and press Enter. Nothing is shown while you paste. DeepTutor then fetches the model list from PayPerQ and printsFound ... model(s). - Pick a model: type c (Custom model name) and press Enter.
- Custom model name: type openai/gpt-oss-20b and press Enter.
- Test connection now? [Y/n]: press Enter. The wizard sends one request to PayPerQ.
- Embedding (RAG / Knowledge Base): type s (Skip / configure later) and press Enter.
- Web search: type s (Skip / configure later) and press Enter.
- Review & save: the review box lists
LLM Custom · openai/gpt-oss-20b · https://api.ppq.ai/v1 ✓ probed. Press Enter at Save these settings? [Y/n]. The wizard printsSettings saved.
Note:
openai/gpt-oss-20bcosts $0.03165 input and $0.13715 output per 1M tokens at the time of writing. See api.ppq.ai/v1/models for current prices.
Note: The model list at api.ppq.ai/v1/models has its own format. The
idfield is the model name you type at Custom model name, andpricingholds the prices.openai/gpt-oss-20bis the model used in this guide. To try a different catalog model, pick itsid; if the connection test fails, rundeeptutor initagain and choose another model.
5. Check the saved provider and model
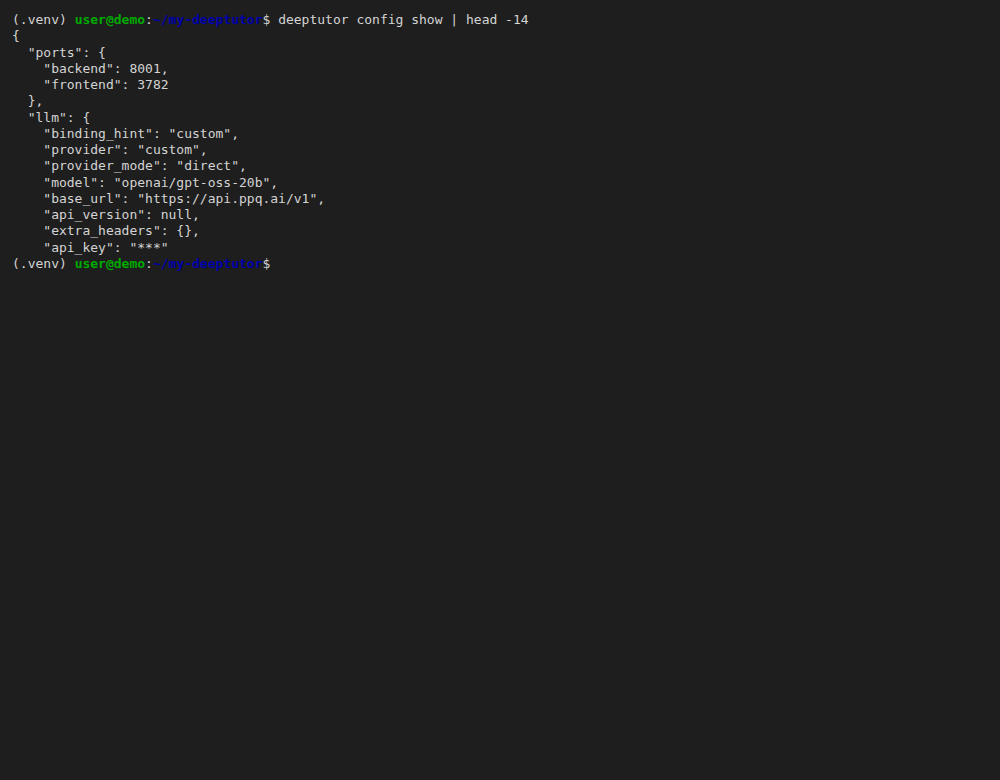
Run a command that shows DeepTutor's resolved configuration with the key hidden:
bashdeeptutor config show
The llm block must show "provider": "custom", "model": "openai/gpt-oss-20b", "base_url": "https://api.ppq.ai/v1" and "api_key": "***".
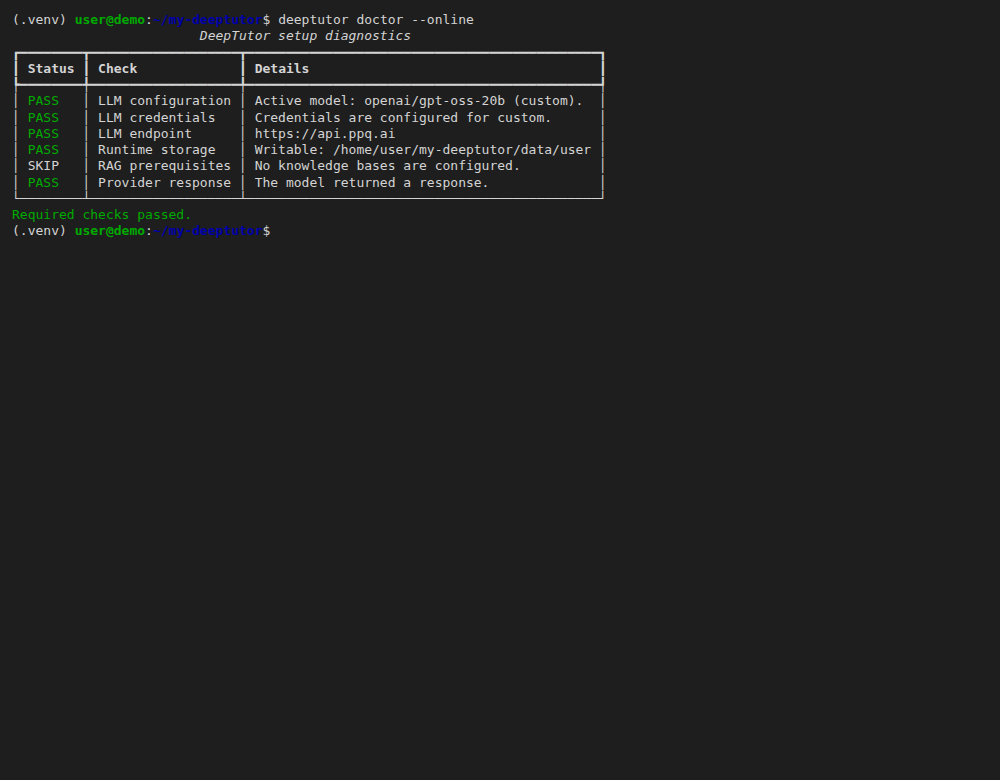
Then run a command that also sends one request to the configured model:
bashdeeptutor doctor --online
Every required check shows PASS, including Provider response The model returned a response., and the last line reads Required checks passed.
6. Send a test prompt
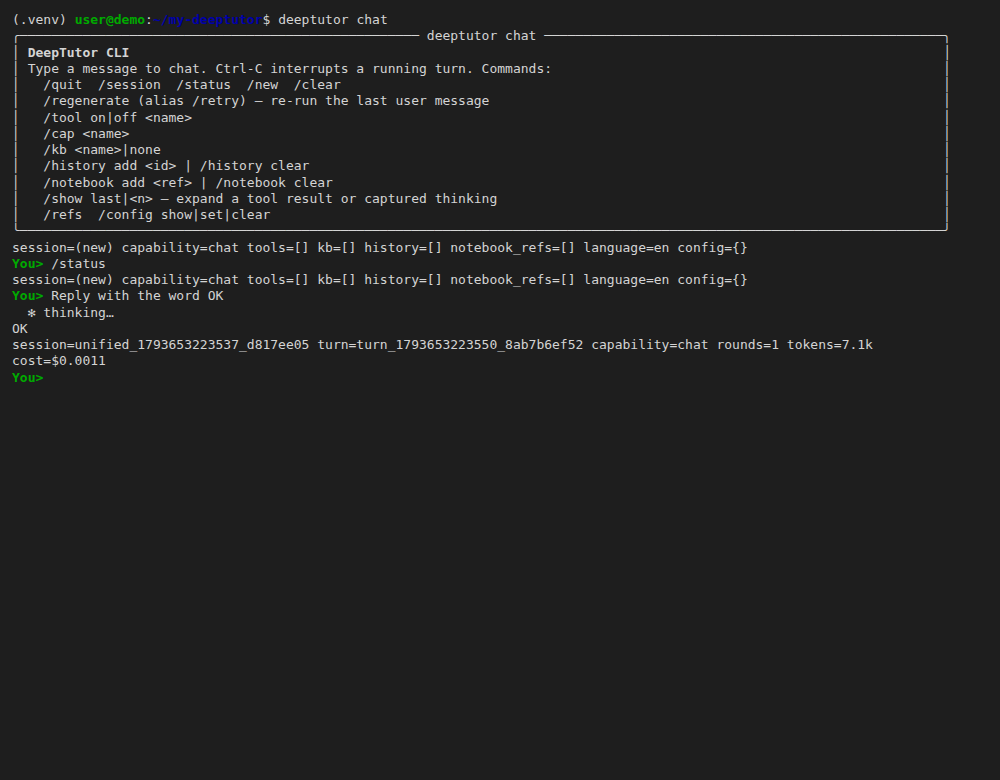
Run a command to open DeepTutor's interactive chat:
bashdeeptutor chat
At the You> prompt, type this message and press Enter:
textReply with the word OK
The model answers OK, followed by a line with the session, token count and cost.
Type /quit to leave the chat.
Optional: DeepTutor's docs describe a web app for the same settings: run
deeptutor start(needs Node.js on your PATH), then openhttp://127.0.0.1:3782.
The setup is complete: DeepTutor now answers through PayPerQ. Check what each request cost on ppq.ai/account-activity. To use another model, run deeptutor init again and enter a different model ID from the catalog.
Troubleshooting
error: externally-managed-environment when running pip install. What happened: the system Python refused a global install. Likely cause: the virtual environment from step 2 is not active. Fix: run source .venv/bin/activate in my-deeptutor and repeat step 3.
HTTP 404 ... No allowed providers are available for the selected model at "Test connection now?". What happened: PayPerQ could not route the request for that model ID. Likely cause: that model (for example google/gemini-2.5-flash-lite) had no provider available for the request. Fix: answer n to "Re-enter API key and retry?", finish and save the wizard, then run deeptutor init again and choose another model such as openai/gpt-oss-20b.
401 Unauthorized from the provider. What happened: the key was rejected. Likely cause: the key was mistyped or revoked. Fix: copy the key again from ppq.ai/api-docs and run deeptutor init again and answer n at the Reuse the LLM API key ...? [Y/n] prompt so you can paste the new key; DeepTutor's docs say re-running the wizard preserves the workspace.
Problems?
Please contact us through the customer communication chatbot in the bottom right of the PayPerQ site, in our Telegram channel or on Discord.
This guide is open source. If a step no longer works, open the guide on GitHub and use the pencil icon to propose a fix, or open an issue; changes go live after a PayPerQ maintainer reviews them.
What is PayPerQ?
PayPerQ is the private way to use AI. You get the big-name models from Anthropic, OpenAI, Google and xAI, the best open-source models, and TEE models that run inside a hardware enclave where not even the model's host can see your data. Chat, image, video and audio, all in one place, with no account and no subscription. You top up a balance with crypto or a card, from as little as 10 cents, and pay only for what you use. Most users spend about $4 a month, against $20+ for a single ChatGPT subscription.
Privacy is built in rather than bolted on. Every chat request is served inside a secure enclave that PayPerQ's servers, staff and logs cannot read into, so PayPerQ never sees your prompts or responses. Choose a TEE model and the model's host cannot read them either.
Why Use PayPerQ?
- Private by default - chats are served inside a secure enclave PayPerQ cannot read, and every chat model shows its privacy tier (Anon, ZDR or TEE)
- No account needed - no sign-up and no email; a credit id is all it takes
- Pay with crypto or card - Bitcoin, Lightning, Monero, stablecoins and more, or a credit card
- Hundreds of AI models from every major provider in one place
- Pay per use - no subscriptions; top up from 10 cents and pay only for what you use, about 1 cent per query on average
- Your history stays yours - conversations are stored on your device by default
Getting Started
- Visit ppq.ai
- Top up your balance with crypto or a card (as little as 10 cents)
- Pick a model, check its privacy tier, and start chatting
No account, no sign-up. Fund and go.